Villa
Oldenhoff

  • Oct 29, 2020
  • Adriaan and Dion
  • Project Planning

At the end of October, we paid a visit to our good friends at Villa Oldenhoff in Abcoude, The Netherlands. They were happy to share their venue with us to use as a quick testing ground for our SLAM algorithm, together with our Photogrammetry solution. We chose one of the neighbouring houses, close to the Villa Oldenhoff building to make a 3D scan. This was due to accessibility to the house and its surroundings. We did not scan the interior of the building.

Blog Images

For our setup we used a LiDAR backpack, a Mavic Drone and a laptop to read the files. With the backpack we did a simple scan of the building by doing two walk arounds. One round to scan the building and a second round as a fail safe for the first round. This was done in around 5 – 10 minutes.

By projecting the coloured point cloud onto the LiDAR point cloud, we create one single point cloud which is both accurate, detailed and with colour.

The next step was to use the drone and take the necessary shots to create an accurate point cloud. We took pictures by flying 4 circles around the building. The 1st circle was from a ground perspective with the drone on eye level. The second circle was around 4m from the ground. With the third circle we were at around an 8m height and the fourth circle was a high areal shot at 15m. We also chose to do some extra top-down view shots of the building to support the accuracy of the point cloud.

BLog ImagesAbove, the coloured point cloud made using Photogrammetry

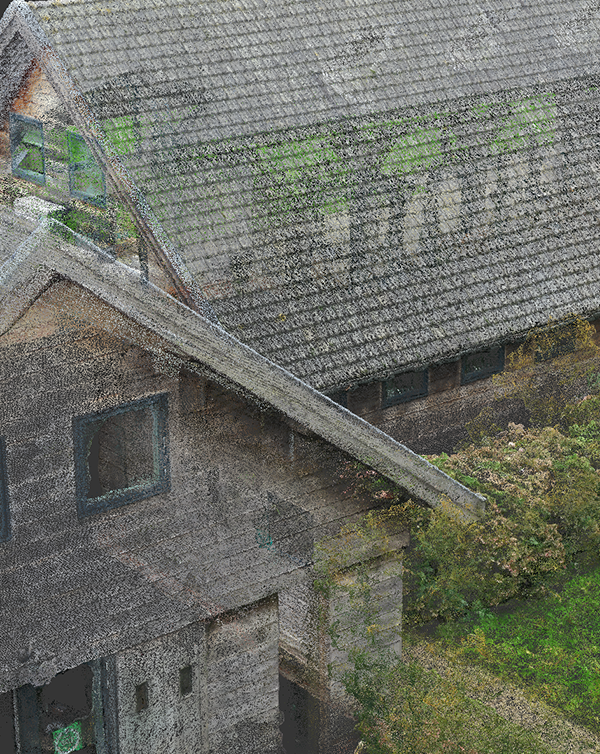
Now that the scanning was complete, we could proceed to processing the data. We processed the data with our SLAM algorithm, which provided us two point clouds. The first point cloud was created with the LiDAR data. This point cloud is highly accurate but does not have any colour information. The second point cloud was created with Photogrammetry. This point cloud has colour and is very detailed but lacks accuracy.

By projecting the coloured point cloud onto the LiDAR point cloud, we create one single point cloud which is both accurate, detailed and with colour.

Further proccessing might include:

  • Creating a texture map from the colour information
  • Turning the point cloud into a mesh
  • Simplifying the point cloud or mesh (decimate)
  • Cleaning the point cloud of noise (excessive points)
  • Exporting to different formats

Below you see the result of our combined LiDAR and Photogrammetry scan. After combining the two point clouds we decided to export the file to a mesh with a single texture. We added artificial lighting to the scene and created an animation. To further explain the possibilities with this kind of technology was the addition of build animation. In this case we constructed a basic porch setup that was solely based on the accurate measurements that our 3D model provided. This means that even with a short 5 – 10 min scan, we can provide all the necessary data that is needed for construction.

Blog Images